Well my faithful blog followers, you have waited a LOOOONG time for another post from me. I have discovered that I am not the best blogger. This should not come as a surprise to me, as I was also that kid that never used a diary, either. So, trying to develop new habits at this rather “mature” date, seems to be harder than I had anticipated, hah! But, not to despair! I hope the wait will be worthwhile. I decided to finally set my mind to tackling the learning curve of creating a little tutorial video. Now, I like to fashion myself as a techie – have some computer background as well as being a nurse by trade, but let me tell you. There were SO many moving parts to this learning curve that I was ready to throw in the towel. However, due to the kind nagging of my “comrades in arms” – a couple of very good friends of mine, who both worked they way through the same learning curve, I am tackling it with a full frontal assault. Here is just a small portion of that learning curve, hope you find it as exasperatingly funny as I did (this morning, after re-counting this to my two very good comrades in arms), whilst I struggled through it into the wee hours of the night last night:
- Find the installation DVD of my video editing software I bought a computer ago. After much digging and praying to St. Anthony, voila! Installation DVD is found exactly where I would have stored it. Should have looked there in the first place, dang.
- Install the program and try to get the rudiments down. Not too bad, looks a little like audio editing software, only with a LOT more buttons, screens, tracks, etc. Kind of like saying, “Gee, I can drive a car, the cockpit of a 747 should look relatively the same, no?” Fortunately, the company has extensive and rather simply done tutorial videos on their web site (they must have known I would be a future customer, mental check mark made in the Plus column for this company)
- Find the camcorder, and then realize it is dead, dead, dead. Now, where the heck is the charger? What does the charger even look like? It could like like many things. Look in the manual to ID the charger, so I can determine what, of about 150 cables and chargers in the “charger junk drawer” might be the Real Charger. Can’t find the manual. Look ALL over the place for the stupid camcorder manual. Yup. In the same place as the video editing software DVD – Where Patty Would Store That Kind of Stuff. Okay, must make mental note to refer to #1 when again, trying to find lost pieces of this learning curve. Probably didn’t help that I had that glass of Chianti at dinner. Just sayin’.
- ID the charger, get the camcorder charging. Phew. Decide to multi-task while the camcorder is charging, and go back to the video editing software web site to take a quick tutorial tour. That was time well spent. Got a good understanding of how the Editor section of the software works. Was also able to type up a quick script to voice over on the video (like I actually know how to do this. Not yet, but certainly, one can do that with video editing software, no? Sounds plausible and like I know what I’m doing. Which I don’t, yet.) And, frankly, the thought of trying to voice-over the video dredges up that gut-twisting feeling of public speaking. Ick. Ick, ick, ick. Could just be the wine. Must get over that if I’m going to make more of these. Which I plan to do.
- Camcorder is charged up. Only took about 1 1/2 hours, not bad. Now, to pull together all the various props for the erstwhile tutorial video. CanNOT find the older foot. Refer to step 1. Yup, Right Where Patty Would Store That Kind of Stuff. That only took about 5 minutes, making progress.
- Okay, to set up the camcorder on the tripod. Sounds relatively easy. Which, it was. However, trying to figure out how to demo the video topic, whilst not hitting-bumping-juggling the camera, and how to NOT totally block the viewer’s view of what I want to demo was with my Big Fat Fingers (they really aren’t, but they kind of look that way in the video), let’s just say, somewhat gymnastically challenging. After about 10 attempts, finally figured out how to stay out of my own way in the video, while not accidentally rolling into the tripod and bumping the camera. Oh. My. Gosh. Frustration level is starting to escalate. Possibly another glass of Chianti is in order, here.
- Now, to plot out the video. Jotting down the process in long-hand, first. These are the steps it takes to complete the process I want to demo. It is amazing how much we actually take for granted, do things we do all the time, or know how to do well. I was surprised at all the steps it took to do something that is relatively simple to do in my mind. Something I don’t really give a lot of conscious thought to. Sort of like discovering that your portion size for your meals is WAY out of kilter with reality!! So, the plotting of the demo finally gets done with much scratching out, re-writing, etc. Now, to compare that to the voice-over narration. Some changing up, editing, re-organizing. Much re-writing. Takes about an hour or two. Egad. This is really something that takes me about 1 minute to do on the machine, no kidding. But, I want to sound professional, but not ridiculously scripted. I have done a fair amount of public speaking in my career, so trying to keep that in mind – “how will my audience respond? Will this be mind-numbing, or reasonably engaging?” I think I am over-thinking this, at this point. Finalize the script. It will be what it will be.
- Start filming. Was able to plot out the video into 7 filming sections. So, now the tricky part – is the narration of each section reasonably timed to match each video section? Nope. Must re-film a few sections. This gets really, really, REALLY tiring. And frustrating. There is probably a better way, I just haven’t figured that out, yet. I may, being the left-handed person that I am, be going at this backwards. This would not be the first time. And, most likely, I am. I’ll worry about that with the next video. Part of the learning curve, right? Finally get everything reasonably matched up. The bonus? I was able to practice the voice-over narration. A lot. So, it sounds reasonably engaging.
- Now, to figure the headset out. The directions say to just, “plug it in”. I do. The video software program cannot hear me in my test. Okay. How about the “On” button. Press the “On” button. No indication on the headset if it is on or off, but the video editing software seems to now be able to hear me, so it must be on. Geesh. Great software, though – it tests to see if your volume is appropriate, and makes the necessary adjustments to fix the volume. Way cool. Liking this software more and more. SO logical.
- Okay. DEEP BREATHS. CALMING BREATHS. Three, two, one and “Record”. Surprisingly, it only took two takes. Not bad. My palms did sweat just a little. But mostly on the first take. It’s odd to hear your own voice. I sound like my sister. But then, everyone has always said that about us, so again, no big surprise there.
- Now, to figure out how to add a few “callouts” (arrows, text and such). Now I’m really just playing a bit, but I think it will help point out certain landmarks on the machine that maybe a few folks are not aware of. So, hopefully it will be worthwhile, and not to kitschy.
- Final step – publish the video. This reminds me a bit of digitizing. You have a working file you save, that you can go back and edit as you wish. Add more video, cut, do fade is and fade outs, add audio, special effects, etc. Then, once your working file is all done, you publish it. Sort of like creating a stitch file from your working digitizing file. Nice analogy, makes it easier to understand the video editing software.
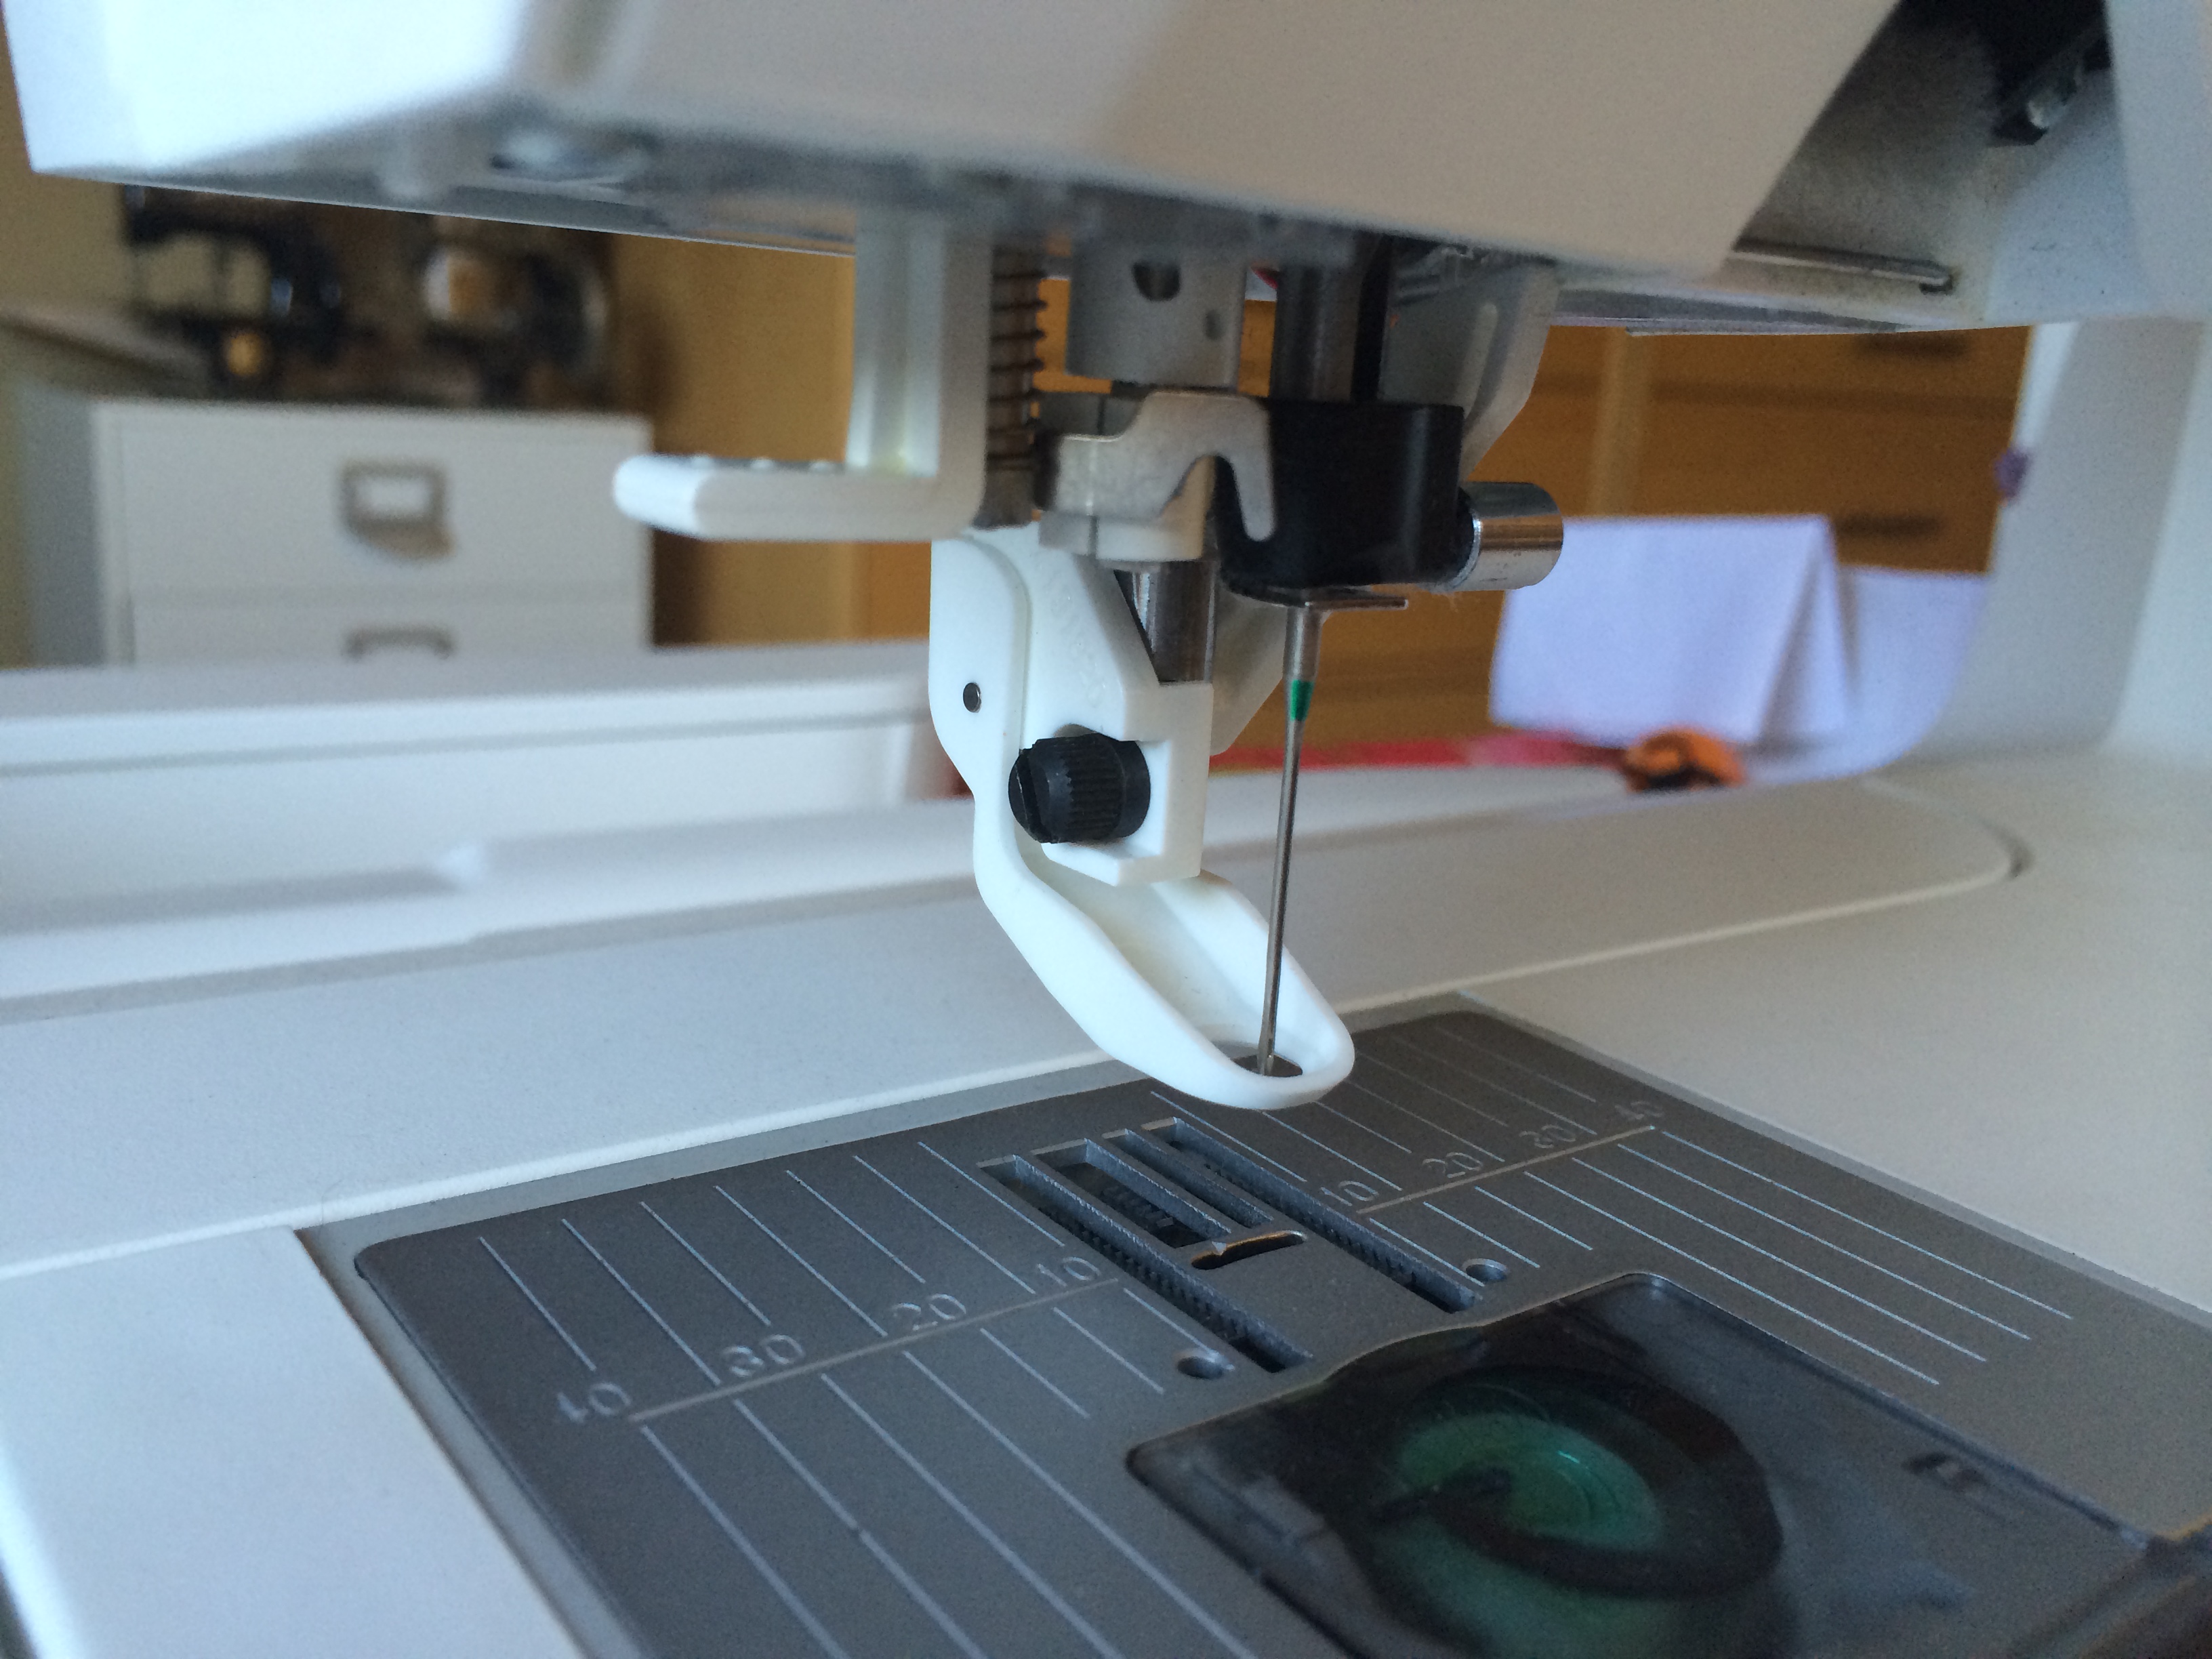
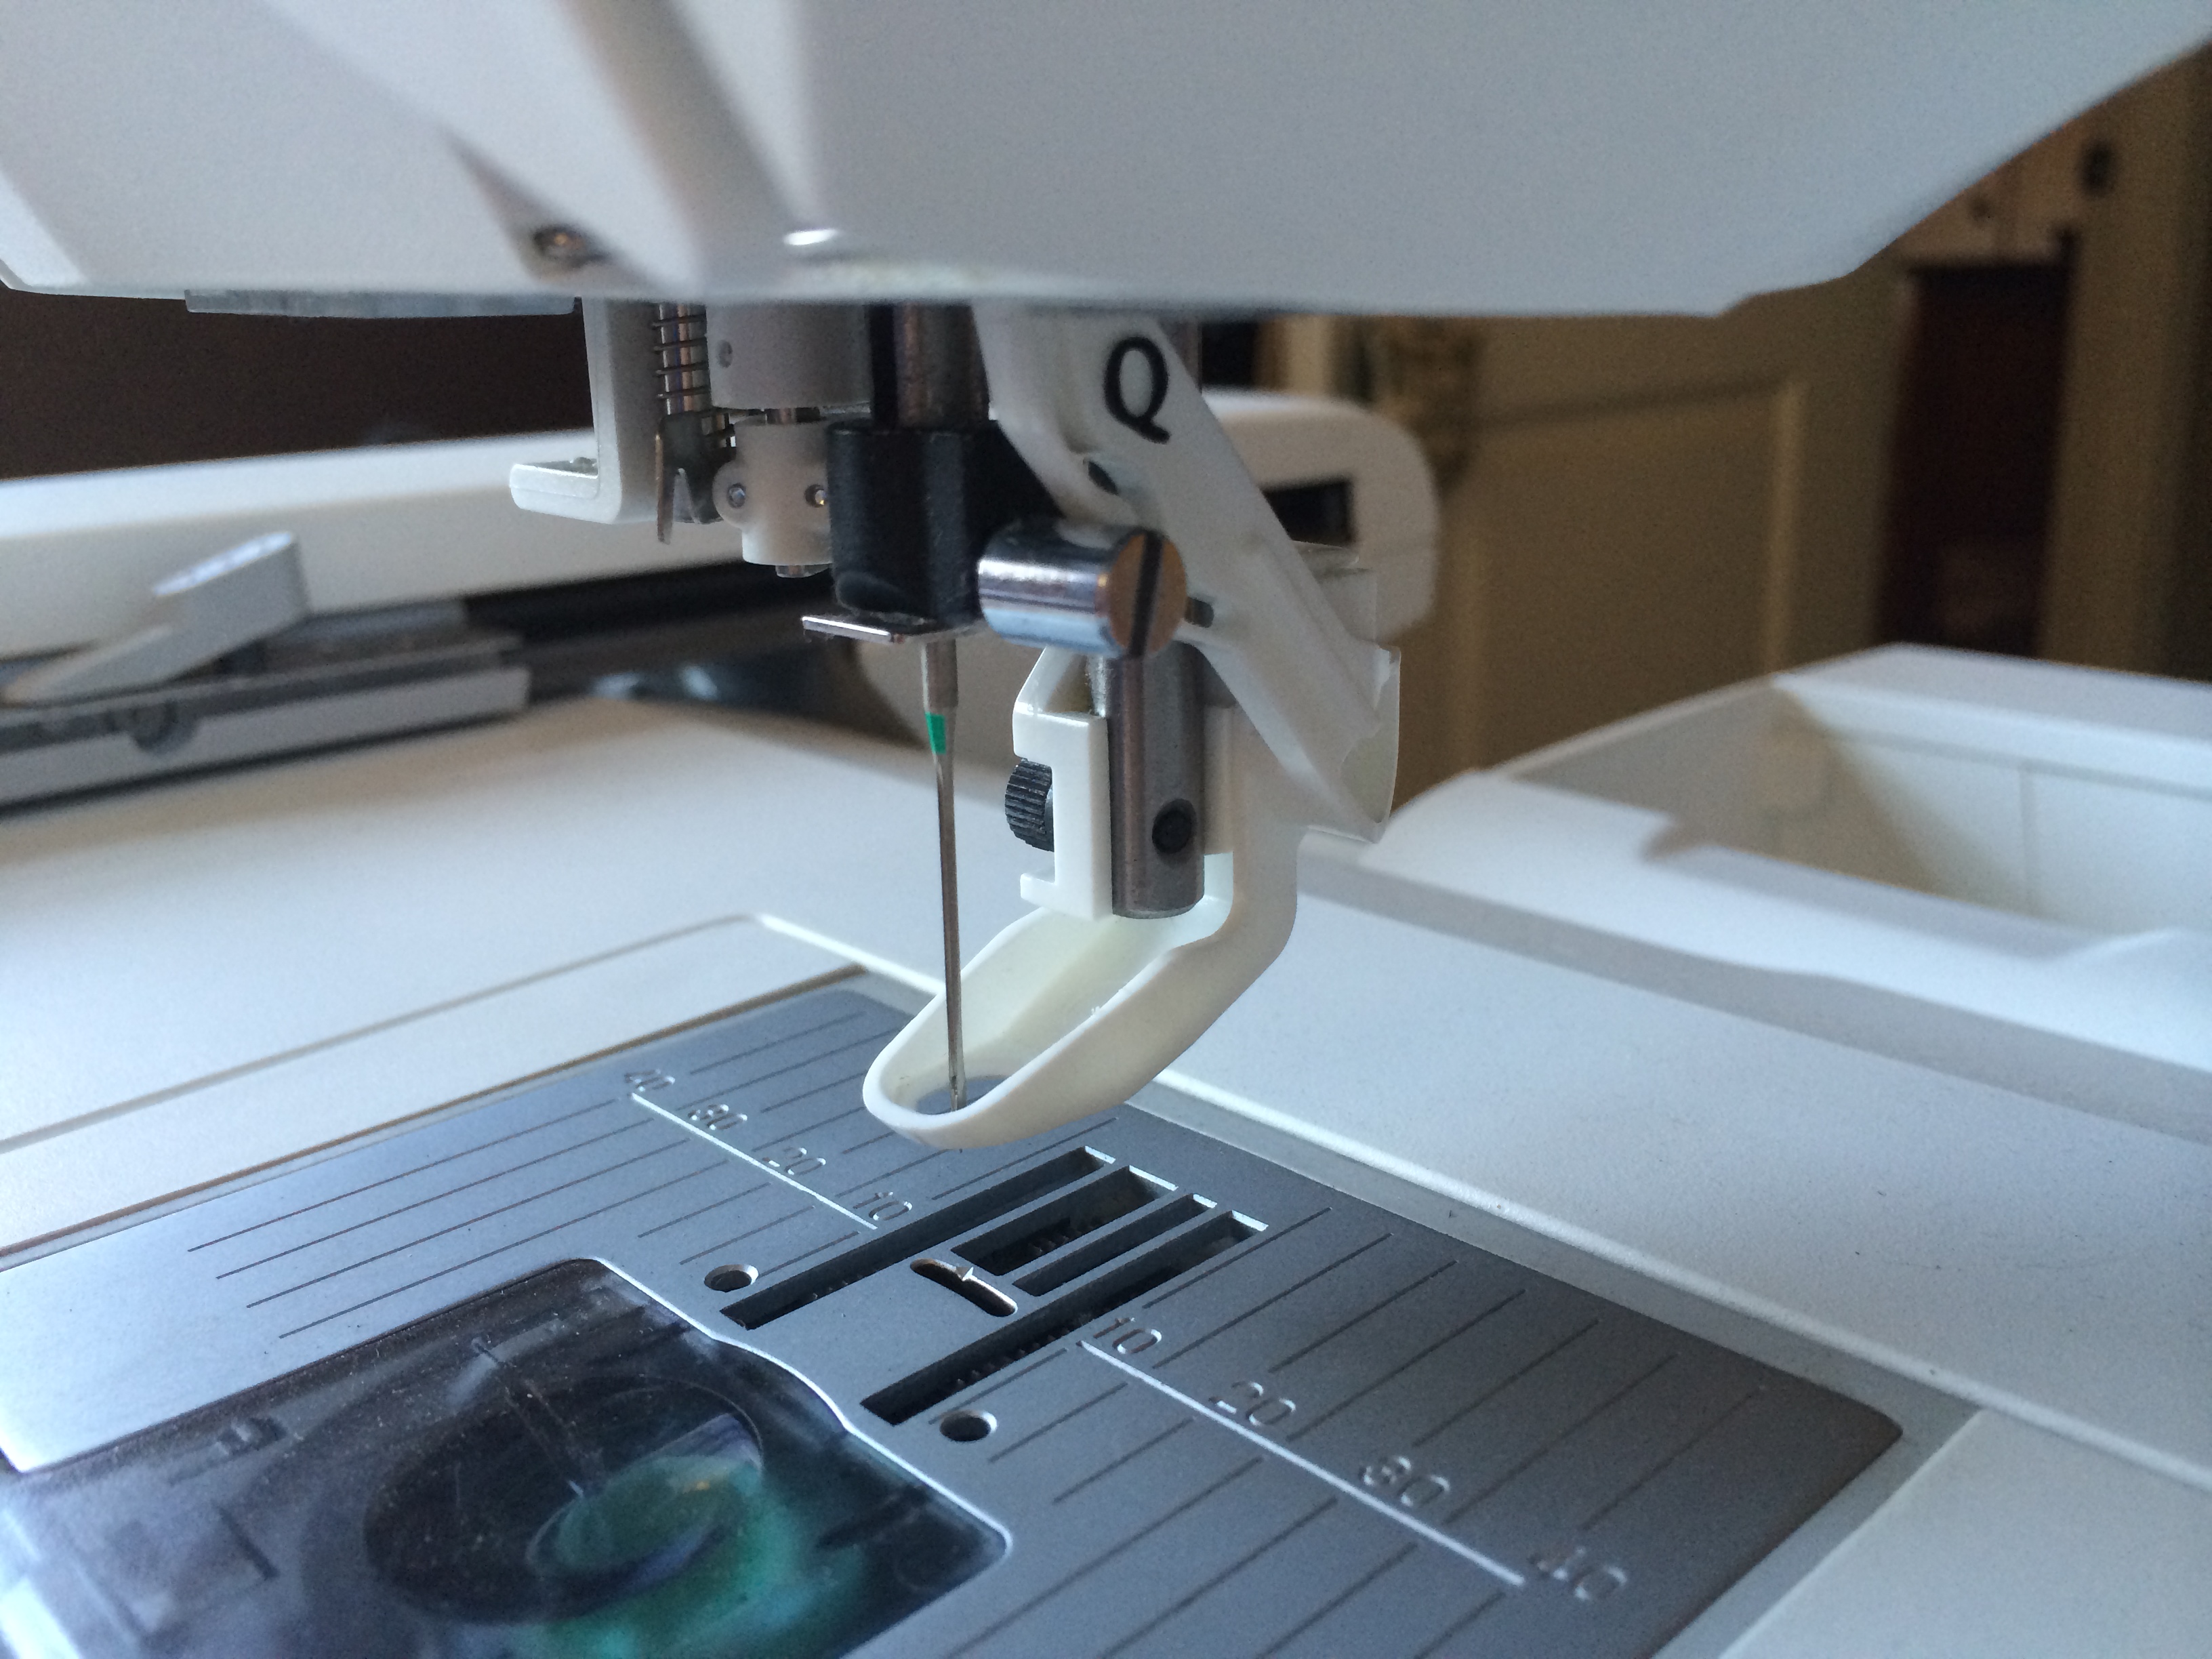
So my lovely bloggers, the video is all done. The tutorial: How to install the Sensor Q foot. I picked this topic because this foot often gives sewers just a bit of a fit, trying to put onto their Gems. So, I hope this will help a few of you feel more confident and competent, in how to install the Sensor Q foot, and how to set your machine for the Sensor Q foot in embroidery mode. Enjoy, and remember, be gentle – my first attempt. It’s a little rough around the edges, but I think you’ll get the idea!!

Thank you for a very clear and helpful video, Patty.
Thank you, Carol! High praise coming from you 🙂
Great video! No one would guess that this was your first,
Thank you for your words of encouragement, Casie. It was quite the (exasperating) learning curve for sure. The good news – it will only get easier from here, lol!!
Loved this video–very easy to see and follow on screen. Thanks
Great video, thank you very much. Fay
You have done a great job!
Thank you both, Fay and Robin, appreciate the words of encouragement!
Thank you Patty. Well done, pleas keep up the good work
Patti, You definitely made the process easier. Thank you for the great video!
Good video, Patty. Now you know how … when can we see some more? (And I think I know where you went wrong with the Chianti – you only had one glass!) Regarding the mess of chargers and cords – I spent half a day recently with my labelling machine and now each and every cable and recharger is labelled. Should have done it years ago.